Ademco - 1375 Audio Processor Tester

File Preview
Click below to download for free
Click below to download for free
File Data
| Name | ademco-1375-audio-processor-tester-2385961470.pdf |
|---|---|
| Type | |
| Size | 1.01 MB |
| Downloads |
Text Preview
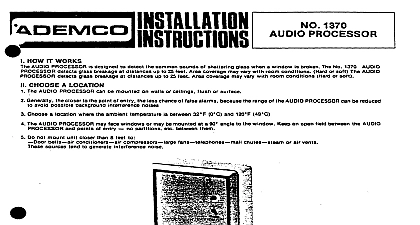
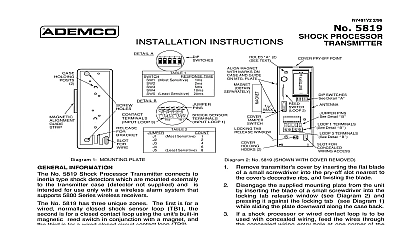
ADEMCO PROCESSOR TESTER OPERATING AUDIO PROCESSOR TESTER is a tool designed to aid in properly locating adjusting the sensitivity of the No 1370 AUDIO PROCESSOR THE AUDIO PROCESSOR TESTER WORKS Audio Processor Tester will monitor and visually display GREEN and RED LEDs all background noises that would most directly affect the PROCESSOR Such noises may be doorbells telephones air compressors If proper sensitivity cannot be achieved due to these noises then muffle the PROCESSOR TESTER FEATURES DESCRIPTIONS LED DISPLAY GREEN YELLOW and LEDs will be your visual out of all interference alarm noises affecting AUDIO PROCESSOR THREE FUNCTION SWITCH the positions are PEAK HOLD MANUAL RESET will indicate PEAK HOLD highest noise most the Audio Processor manual reset PEAK HOLD AUTO RESET on visual read out two seconds only INSTANT RESPONSE constant visual out of all noises affecting the Processor depress to reset PEAK HOLD or turn on the Audio Processor Tester Processor Tester shuts off automatically 4 minutes unless reset TEST LEAD 8 ft test lead BRASS PLUG CONNECTORS RED 8 BLACK to be inserted into the PROCESSOR An additional pair of connectors are enclosed the Audio Processor Tester ON LED This blinking red LED indicates your Audio Processor Tester is on the LED display other than your power ON LED begins blinking replacement the 9 volt battery is necessary TO FOLLOW IN USING THE AUDIO PROCESSOR TESTER Insert the test leads into the Audio Processor as listed below 1370 Black connector to the LEFT red to the RIGHT If your Audio Processor Tester indicates no response try reversing the Switch the Audio Processor Tester to one of the 3 function positions Push RESET button to turn on your Audio Processor Tester ON LED will begin Collect some broken glass and place it in a jar with a screen cover later to be in duplicating sound of glass breakage Start with the sensitivity adjustment on the Audio Processor set all the way turn counter clockwise refer to example f l Stand next to windows in the area the Audio Processor is to protect and gently stages the jar in an up and down motion while increasing the sensitivity to example 2 When proper sensitivity has been achieved the upper or red LEDs should light up at the same time the Audio Processor LED alarm l 2 After you have adjusted the Audio Processor to trip with the sounds of broken you should simulate or cycle any potential problem noises telephones bells etc Watch their levels of intensity at the LED display on the Audio Processor Tester the Audio Processor by If any noise levels fall into OK Potential alarm muffle source or m locate Audio Processor condition muffle source or m locate Audio Processor NOTE Do not readjust the Audio Processor sensitivity because of potential problem noise Either re locate the Audio Processor or muffle the source Copyright 1982 PITTWAY CORPORATION