Ademco - 6138 Remote Keypad Installation Guide

File Preview
Click below to download for free
Click below to download for free
File Data
| Name | ademco-6138-remote-keypad-installation-guide-6532498071.pdf |
|---|---|
| Type | |
| Size | 946.84 KB |
| Downloads |
Text Preview
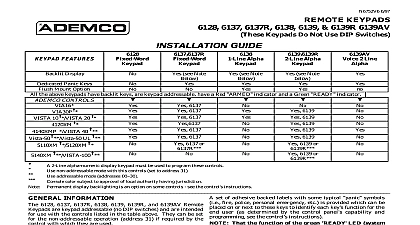
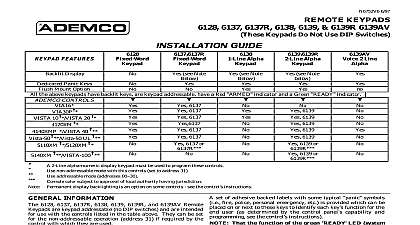
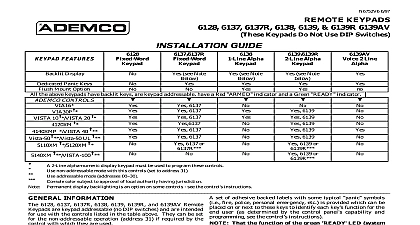
N6752V6 6 97 KEYPADS 6137 6137R 6138 6139 6139R 6139AV Keypads Do Not Use DIP Switches FEATURES Display GUIDE see Note Alpha see Note Panic Keys Mount Option the above keypads have backlit keys are keypad addressable have a Red ARMED indicator and a Green READY indicator CONTROLS 10 20 VISTA 40 UL 6137 6137 6137 6137 6137 6137 or Alpha see Note 6139 6139 6139 6139 6139 6139 or 6139 or 2 Line 2 Line alpha numeric display keypad must be used to program these controls non addressable mode with this controls set to address 31 addressable mode addresses 00 color subject to approval of local authority having jurisdiction display backlighting is an option on some controls see the control instructions set of adhesive backed labels with some typical panic symbols fire police personal emergency etc is provided which can be on or next to these keys to identify each key function for the user as determined by the control panel capability and see the control instructions That the function of the green READY LED system differs from the function of the green LED on 4137AD 5137AD and 6127 keypads AND INSTALLATION keypads can be surface mounted directly to a drywall or to a or double gang electrical box For flush mounting the 6138 6139 6139R to drywall use the optional 6139TRK flush mount 6128 6137 6137R 6139AVcannot be flush mounted Remove the case back by pushing down two snaps See INFORMATION 6128 6137 6137R 6138 6139 6139R and 6139AV Remote are keypad addressable no DIP switches and are intended use with the controls listed in the table above They can be set the non addressable operation address 31 if required by the with which they are used The 6137R and 6139R have red bezels instead of gray they are exactly the same as the 6137 and 6139 display on a Fixed Word Keypad provides 2 digit numerics for identification and a set of pre designated English language e g ALARM AWAY STAY CHECK etc for the system status 2 line Alpha Keypad is equipped with a programmable 2 line 32 16 character per line English language display for zone identification if descriptors are programmed plus status The 6139AV is an alpha keypad with a built in and microphone to be used with a VIM 2 Way Voice One Line Display Keypad Some controls e g Via30P VISTA20 send two 1 line displays of information to the keypad To display the second line of information press the Press the key again to return to the first line of information display automatically returns to the first line of information if key is pressed for 3 seconds After pressing the key to view the second line or to the first line wait at least 3 seconds before entering control panel command e g arm the system keys on the keypads are located behind a decorative door and continuously backlit for convenience The inside of the door has space for a zone ID label supplied on which the can write descriptions of each zone for handy user keypads allow Panic Alarm activation if enabled in control For the 6128 panic alarms are activated by pressing pairs 1 and 3 The 6137 6137R 6138 and 6139AV are equipped with dedicated single keys panic activation keys A B and C the D key is not used as which are equivalent to the 1 and 3 keys panic keys A B and C must be held down for at least seconds to activate an alarm Mount the case back to a wall or electrical box Plug the supplied flying lead connector into the keypad PC and splice the panel wiring to it Wire keypads and are described in the SPECIFICATIONS section Re attach the keypad to its case back Remove the clear protective films from the LCD display and case back by down 2 snaps the keypad top and pulling the case Route wiring from the control panel through the opening in the OF DEDICATED KEYS KEY NOT FOR PANIC FUNCTIONS KEY USED FOR SETTING AND LEVELS ON 6139AV below labels back CODE CHIME BYPASS KEYPAD AUDIO CONNECTION 2 WAY VOICE OPERATION Follow the instructions for WIRING AND MOUNTING above The 6139AV requires a shielded 2 wire connection to a Voice Module VIM Splice the flying leads of the supplied Audio Bus connector to this shielded cable then plug connector into the 6139AV keypad J5 connector located the lower right hand side of the PC board Connect the shield at the VIM module not the keypad as shown in the VIM wiring diagram ALL KEYPADS CONNECT CONTROL KEYPAD 6139 AV KEYPADS VIM AUDIO TERMINALS SHIELD AT VIM NOT AT KEYPAD SA550AB AUDIO CONNECTOR SPLICED TO CABLE WHEN USING 6139AV KEYPAD the keypad Address no DIP switches keypad can be set for an address of 0 31 the keypad will not entries greater than 31 which is stored in EEROM memory keypad default address is 31 non addressable mode versions of 6139 6139R default to 11 For operation with the VIM the 6139AV can only be to addresses 01 Address 00 is reserved for a two line non keypad change the keypad address do the following Enter address mode Power up plug in the keypad Within 60 of power up press and hold down the 1 and 3 keys at same time for 3 seconds If unable to enter address mode and try again current keypad address will be displayed and the cursor will under the tens digit If 10 seconds have passed with no key the keypad automatically exits address mode You must down power up and start address mode again The keypad will not enter address mode if the panel which it is connected is in programming mode Set the current address to 00 Press 0 to clear the current digit The cursor will move to the ones digit position 0 to clear the current ones digit The cursor will move to the tens digit position Enter the keypad address Enter the proper tens digit of keypad address The cursor will move to the ones digit Enter the proper ones digit of the keypad address that address 31 sets the keypad to non addressable mode Exit address mode to save the displayed address and exit address mode the Keypad Address and hold down the 1 and 3 keys at the same time for about seconds The current address is displayed No key entry is Press any key to exit or wait 10 seconds to exit viewing Keypad Audio Level Selection talk and vox volume of the 6139AV keypad can be for high medium or low The factory default is Enter the keypad programming mode by pressing and holding the 1 and 3 keys at the same time for 3 seconds The address is displayed Press and hold hold down the D key for 2 seconds The current level is displayed high medium or low Press the key repeatedly to toggle the level settings from high medium to low until the desired level is displayed Press and hold the D key until the vox level is displayed Repeat step 3 Press to exit keypad programming mode keypad returns to normal mode if no key is pressed for 30 down the keypad does not change the level setting 4 3 4 H x 5 3 4 W x 1 D 121mm x 146mm x 25.4m


