Ademco - MX8000 CPU Installation Instructions
File Preview
Click below to download for free
Click below to download for free
File Data
| Name | ademco-mx8000-cpu-installation-instructions-7146390852.pdf |
|---|---|
| Type | |
| Size | 667.03 KB |
| Downloads |
Text Preview
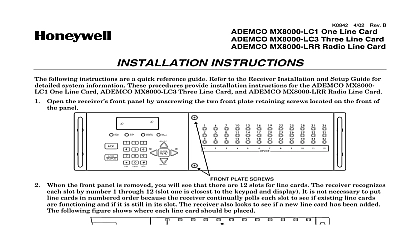
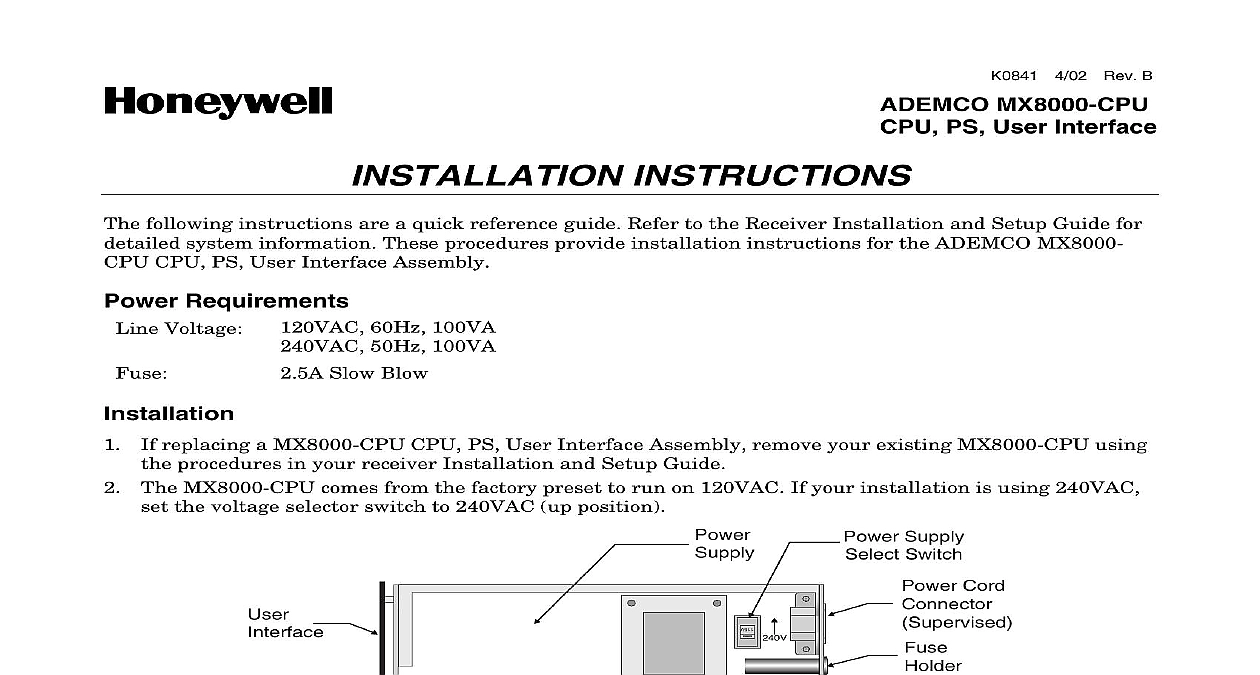
4 02 Rev B MX8000 CPU PS User Interface INSTRUCTIONS following instructions are a quick reference guide Refer to the Receiver Installation and Setup Guide for system information These procedures provide installation instructions for the ADEMCO MX8000 CPU PS User Interface Assembly Requirements Voltage 120VAC 60Hz 100VA 50Hz 100VA Slow Blow If replacing a MX8000 CPU CPU PS User Interface Assembly remove your existing MX8000 CPU using procedures in your receiver Installation and Setup Guide The MX8000 CPU comes from the factory preset to run on 120VAC If your installation is using 240VAC the voltage selector switch to 240VAC up position Supply Switch From the front of the receiver slide the replacement CPU PS User Interface Assembly into the receiver On the back of the receiver install the four screws that hold the CPU PS User Interface Assembly in VAC 10 VAC 10 Hz VA VOLTAGE PRESENT AC LINE AND OTHER CONNECTORS TO SERVICING RATING 48VAC VDC NC 1 2 BLOW ONLY A FUSE SAME TYPE NO COM Connect the AC power cable Make sure to plug the AC power cable into a grounded outlet See your receiver Installation and Guide for a procedure on how to verify earth ground Cord Connect the back up battery See your receiver Installation and Setup Guide for the procedure Install the receiver front plate by screwing in the front plate retaining screws IN EVENT EVENT Program the receiver in accordance with the instructions provided in the receiver Installation and Setup PLATE SCREWS Eileen Way Syosset New York 11791 2004 Honeywell International Inc 4 02 Rev B