DSC FSD-210 Installation Instructions- English - Printed in Czech 17

File Preview
Click below to download for free
Click below to download for free
File Data
| Name | dsc-fsd-210-installation-instructions-english-printed-in-czech-17-3071948625.pdf |
|---|---|
| Type | |
| Size | 1.08 MB |
| Downloads |
Text Preview
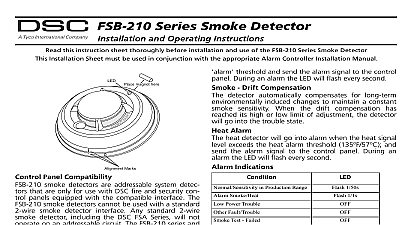
FSD 210 Series Smoke Detector and Operating Instructions this instruction sheet thoroughly before installation and use of the 2 Wire Smoke Detector This instruction sheet shall be used in conjunc with the Installation Manual of the alarm control panel All the instructions within that manual must be observed Test Button magnet here Siren P A A I I N N T T N N O O T T Marks FSD 210 is a 2 wire photoelectric smoke detector with piezoelectric alarm and optional fixed temperature detector and or auxiliary form C relay Two versions are US version UL and Canadian version ULC For requiring tandem alarm operation refer to the series modules and FSA series smoke detectors every 7 to 8 seconds the unit tests for a smoke heat alarm condition During this sequence the unit also self diagnostics and checks for faults During normal the LED will flash every 50 seconds and the siren will sound Alarm Instructions Smoke Detector Placement smooth ceilings detectors be spaced 9.1M 30 feet as a guide Other spacing be required depending on height air movement the of uninsulated etc Consult National Fire Code NFPA 72 Chapter 11 national standards for recommendations smoke detector has a nominal fixed alarm sensitivity refer the Specifications on the last page and it will go into alarm the signal level exceeds the alarm threshold and send alarm signal to the control panel During an alarm the LED flash 1 second and the siren will sound the evacuation pattern UL or continuous beeps ULC Drift Compensation detector automatically compensates for long term envi induced changes to maintain a constant smoke When the drift compensation has reached its high low limit of adjustment the detector will go into the trou state Alarm heat detector will go into alarm when the heat signal level the heat alarm threshold 135 and send the signal to the control panel During an alarm the LED will 1 second and the siren will sound the evacuation tempo pattern UL or continuous beeps ULC Indications Sensitivity Production Range Flash 1 50s 1 1s Smoke Heat Restore 1 1s Power Trouble Trouble Switch Failed Switch Pass 1 1s or or 1 50s Deactivated 1 50s Deactivated or doors NOT locate smoke detectors at the top of peaked or ceilings the dead air space in these locations may pre the unit from detecting smoke Avoid areas with turbu air or windows Rapid air around the detector may prevent smoke from the unit Do NOT locate detectors in areas of high NOT locate detectors in areas where the temperature rises 38 100 or falls below 5 41 Smoke detectors in accordance with NFPA 72 11 detectors shall be installed outside of each area in the immediate vicinity of the bedrooms and each additional story of the family living unit including and excluding crawl spaces and unfinished attics new construction a smoke detector also shall be installed in sleeping room Mount Smoke Detector Backplate backplate using screws pro and the appropriate holes on mounting plate wiring in accordance the appropriate national and electrical codes For UL ULC the power supply must supplied from a UL ULC Listed control unit The dust cover protects unit when not in service Remove dust cover before use Wiring to the wiring diagrams in this installation sheet and provided in the Installation Manual of the alarm control being used with the unit Before connecting the unit the wires from the electrical box for connection Do use frayed or bent wire Holes Device NC C Do NOT use looped wire under terminals Break wire run to provide supervision of connections wiring is completed inspect the wiring and correct any before applying power to the unit When the wiring has thoroughly reviewed neatly insert the wires into the box and secure the unit to the mounting plate connect this device use only wiring listed as fit for the pur Mounting Installation the detector on to the base using the detector and base plate marks Press the detector in place while rotating the detec clockwise until the detector snaps place Remove the side tab from locking tab to lock in place optional If the side tab is removed to lock the detector tab with a small flat blade screwdriver and rotate counter clockwise until the alignment marks line up detector Test Unit test by pressing the test button for greater than 5 sec activation is indicated by the LED the siren and the reporting to the Control Panel The detector restores to when the test button is released or when the magnet removed Allow a minimum of 20 seconds between test activa the detector is in one of the following states when a test is it will not enter an alarm state Compensation trouble Failure of heat or smoke detector Other internal faults that could prevent a smoke or heat Smoke sensitivity of installed detectors can be mea without removal or an alarm being generated using the Smoke Detector Test Meter Unit with FSD 100 Smoke Detector Test Meter test the unit using the FSD 100 set the test meter up to devices as per the instructions supplied with the test Depress the test button or place the FSD 100 on outside edge of the plastics beside the test button to acti the reed switch on units without siren on the smoke for 1 second and release If the test button is held for 5 seconds or longer an will be generated Move the test meter over the center the detector wait until you hear the test meter beep the unit and the information can be immediately Please see the instructions supplied with the FSD Smoke Detector Test Meter for more information the tests one at a time Performing simultaneous tests multiple detectors may trigger an alarm at the control Removing the Chamber for Cleaning clean or replace the smoke chamber the detector must be Press the 3 tabs on the bottom of the detector outward to Remove the bottom portion which contains the PCB and chamber Place thumb and forefinger on the sides of the chamber in locations indicated by the arrows on top of the cham Squeeze gently inward and pull up and the chamber will The removable portion can now be replaced or cleaned can be done using compressed air Do not use a as it may leave particles on the inner wall Replace the new or cleaned chamber by pressing it down it snaps into place Locate and press the backplate the housing making sure the 3 locking tabs are into their locked position Compensation Reset replacement of the smoke sensor or other changes change the background signal noise of the detector this the drift compensation be reset Compensation trou is one of the faults indicated when the LED indicator is OFF the siren is chirping Remove power from the unit then press and hold the test for 30 seconds to power down unit Power up unit while pressing the test button The LED will when 5 seconds has elapsed Release the test button 1 second after the fifth LED flash The LED will flash every 8 seconds for 1 minute When the stops flashing test the detector to verify normal Instructions Safety In The Home fires occur in the home and to minimize this danger it is that a household fire safety audit be con and a family escape plan be developed Fire Safety Audit Are all electrical appliances and outlets in safe condition for frayed cords overloaded lighting circuits etc If are uncertain about the condition of your electrical or household service have a professional evalu Are all flammable liquids safely stored in closed containers in a cool and well ventilated area Avoid cleaning the with flammable liquids Are hazardous materials such as matches ou


