DSC HS2LCDWF Installation Guide v1 0 - R001 EN-FR-ES-PO

File Preview
Click below to download for free
Click below to download for free
File Data
| Name | dsc-hs2lcdwf-installation-guide-v1-0-r001-en-fr-es-po-3128075964.pdf |
|---|---|
| Type | |
| Size | 3.45 MB |
| Downloads |
Text Preview
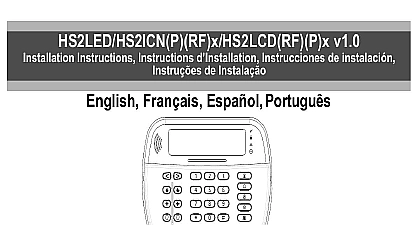
Installation Instructions Instructions d de instalaci v1.0 de Instala Fran Espa Portugu Refer to the PowerSeries Neo Reference manual for information on limitations regarding product use and function and information on the limita as to the liability of the manufacturer Consultez le manuel de r PowerSeries Neo qui contient des informations au sujet des limites d et de fonctionnement au produit et la responsabilit du fabricant Consulte el Manual de referencia de PowerSeries Neo para obtener informaci sobre las limitaciones con respecto al uso y funci del as como informaci sobre las limitaciones relacionadas con la responsabilidad civil del fabricante Consulte o manual de Refer PowerSeries Neo para informa sobre as limita referentes a uso e funcionamento do produto e informa limita como a responsabilidade do fabricante HS2LCDWF keypad package is available in configurations keypad contains patented technology for the Prox Tag prox tag wall 1 HS2LCDWF wall 1 HS2LCDWF wall 1 installation manual 1 inner door sticker 4 AA batteries 1 hardware pack 1 prox tag 1 installation manual 1 inner door sticker 4 AA batteries 1 hardware pack prox tag verbal annunciation 1 HS2LCDWF wall 1 installation manual 1 inner door sticker 4 AA batteries 1 hardware pack 1 prox tag the keypad where it is accessible from desig points of entry and exit Once a dry and secure has been selected perform the following to mount the keypad Instructions instructions must be used with the appropriate panel installation manual with which this is intended to be used Operating instruc shall be made available to the user HS2LCDWF wireless keypad is compatible wireless transceivers HSM2HOST and HS2LC keypads Temperature range 10 to 55 14 to UL ULC 0 to 49 32 to 120 Humidity MAX 93 R H non condensing Plastic enclosure protection degree IP30 IK04 Power adaptor output voltage 9.0VDC 1.25A US Latin America HK XX11 U09N Canada HK XX11 U09NC ULC EU UK HK XX11 U09NGB China HK XX11 U09NAU limited supply acceptable to the authority having Restraints are in place for UL installations This product is not to be connected to a that is controlled by a switch Battery 4 AA 1.5V Energizer alkaline con E91 Low Battery Indication 4.5V HS2LCDWF current draw 30mA min Wall mount tamper connected when installed in commercial applications 5 programmable function keys Ready Green LED Armed Red LED Trou Jam Red Yellow LED AC Green LED Frequency 433MHz Brazil China Aus CE NA South Africa ICASA MEA India Frequency 868MHz EN Local MEA CE Frequency 912 919MHz NA LATAM Argen For UL commercial installations the tamper are enabled Mounting Plate Locate the screw holes 4 at each corner of the plate Use the four screws provided to affix the mount plate to the wall ensure the mounting tabs facing you see following diagram If the is to be mounted on drywall use plastic Once the batteries are installed align the four slots in the HS2LCDWF housing with four mounting tabs protruding from the plate Firmly but carefully snap the keypad down onto mounting plate hole hole tab tab tab hole tab hole Stand Insert the four rub feet found in hardware pack the indentations in the bot of desk Place the desk stand on a secure uncluttered sur the four mounting slots in the HS2LCDWF with the four mounting tabs protruding the desk stand Slide the keypad into place Firmly but carefully the keypad down onto the desk stand fasten the keypad securely onto the desk locate the hole in the center of the bottom the desk stand Using the screws provided the keypad to the desk stand Battery Power If required slide the keypad up and out from the plate desk stand removing the screws if required The bay for the four AA batter is open and visible at the back of the keypad Insert the batteries as directed on the back of the Ensure the correct polarity is observed Replace the keypad on the mounting plate desk Do not mix old batteries with new ones channel AC Power The socket outlet in which the direct adaptor is inserted must be close to the key easily accessible and have unobstructed access plug of the adaptor serves as a means of discon from the supply mains Slide the keypad up and out from the mounting Locate the power adaptor jack at the back of the stand housing Place the adaptor plug in the housing indentation to the keypad Insert the adaptor firmly into the jack Pivot the adaptor plug downwards so that it fits with the housing Guide the AC wire along channel provided in the keypad housing the will extend through the bottom of the hous Replace the keypad on the mounting plate desk in the latter case a further channel is pro in the bottom of the desk stand Guide the wire along this channel the wire will extend an opening in the back of the stand Plug the adaptor into a wall outlet use the power adaptor 9.0VDC 1.25A limited power supply for models HK XX11 UL and HK XX11 U09NC ULC the Keypad are several programming options available for keypad see the following table Programming keypad is similar to programming the rest of the The installer menu is a text driven flow For on programming the rest of your security refer to your system installation manual Press 8 Installer Code Use the keys to navigate through the or jump directly to a specific section by the section number Programming enter language programming enter 000 000 enter the two digit number that corresponds to language desired English default Spanish Portuguese French Italian Dutch Polish Czech Finnish German Swedish Norwegian Danish Hebrew Greek HSM2HOST HSM2HOST wireless transceiver or HS2LC keypad must be enrolled onto the panel before any wireless devices can be When the alarm system is powered up for first time the first keypad or the HSM2HOST if a wireless keypad as the first keypad can be To do this Once the HSM2HOST is wired to the alarm panel power has been applied power up a wireless Press any button on the keypad to enroll it on the The HSM2HOST is then automati enrolled on the alarm panel Turkish FFU Croatian Hungarian Romanian Russian Bulgarian Latvian Lithuanian Ukrainian Slovakian Serbian Estonian Slovenian Keypad Press 8 Installer Code and then 804 000 prompted either activate the device to immediately or enter a device serial num Do the latter to pre enroll devices then enroll later at the customer site Use the keys or enter the corresponding to select an option Scroll through the available selections and enter a or enter text as appropriate Press to accept and move to the next option Once all options are configured the system you to enroll the next device Repeat this process until all wireless devices are For UL ULC Residential Fire applications HS2LCDWFP9 HS2LCDWFPV9 must be set up for 200 seconds wireless by enabling toggle option 4 200s Fire in section 804 810 Keypad Press 8 Installer Code and then 804 905 Use the keys to select the keypad or press to exit Press to del


