DSC T-Link TL150 v1 0 - Installation Manual - English - Spanish - PowerSeries IP Communicator

File Preview
Click below to download for free
Click below to download for free
File Data
| Name | dsc-t-link-tl150-v1-0-installation-manual-english-spanish-powerseries-ip-communicator-8053691274.pdf |
|---|---|
| Type | |
| Size | 739.65 KB |
| Downloads |
Text Preview
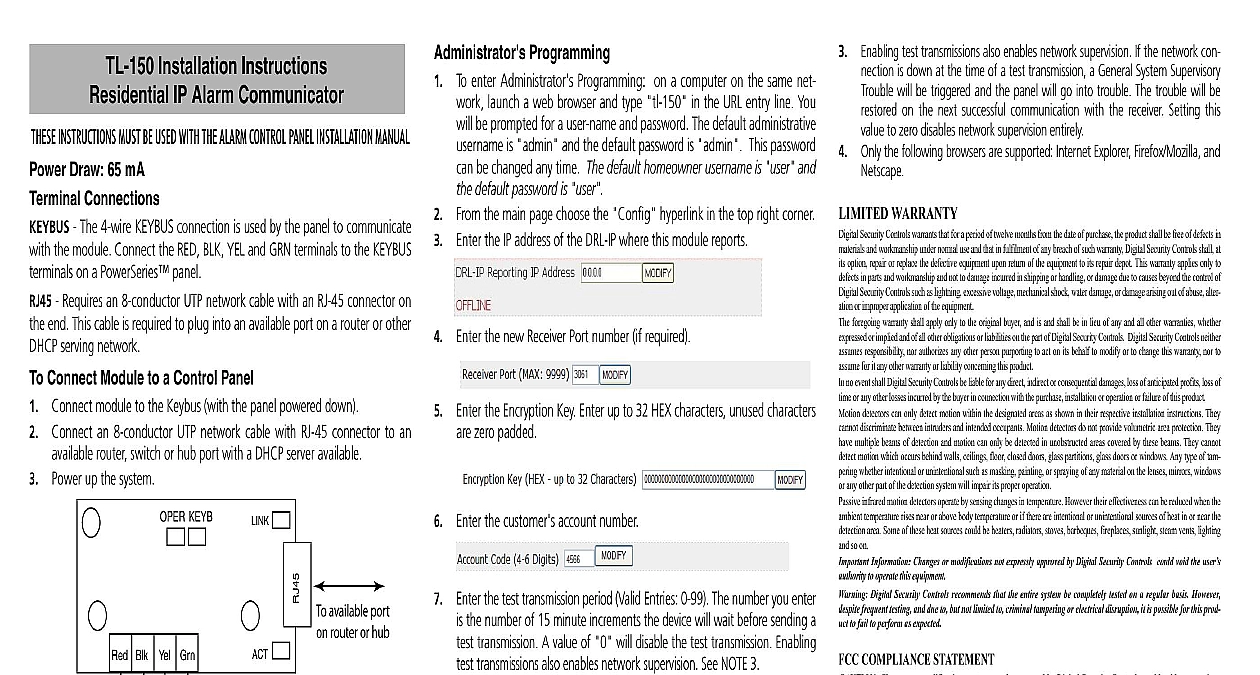
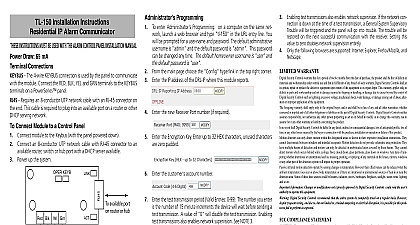
TL 150 Installation Instructions IP Alarm Communicator INSTRUCTIONS MUST BE USED WITH THE ALARM CONTROL PANEL INSTALLATION MANUAL Draw 65 mA Connections The 4 wire KEYBUS connection is used by the panel to communicate the module Connect the RED BLK YEL and GRN terminals to the KEYBUS on a PowerSeries panel Requires an 8 conductor UTP network cable with an RJ 45 connector on end This cable is required to plug into an available port on a router or other serving network Connect Module to a Control Panel Connect module to the Keybus with the panel powered down Connect an 8 conductor UTP network cable with RJ 45 connector to an router switch or hub port with a DHCP server available up the system Programming enter Administrator Programming on a computer on the same net launch a web browser and type tl 150 in the URL entry line You be prompted for a user name and password The default administrative is admin and the default password is admin This password be changed any time The default homeowner username is user and default password is user the main page choose the Config hyperlink in the top right corner the IP address of the DRL IP where this module reports the new Receiver Port number if required the Encryption Key Enter up to 32 HEX characters unused characters zero padded KEYB the customer account number Blk Yel Grn available port router or hub the test transmission period Valid Entries 0 99 The number you enter the number of 15 minute increments the device will wait before sending a transmission A value of 0 will disable the test transmission Enabling transmissions also enables network supervision See NOTE 3 PANEL Administrator password The TL 150 module automatically enrolls with the security system as module Security system is not connected Security system detected but device does not have IP Normal operation System is not powered Normal operation Hardware fault Upon Ethernet activity Incoming packets only No Ethernet link Ethernet link established the module using the Reboot Module link at the bottom of page of Admin Password the installer forgets the administrator password it is possible to default the administrator password Defaulting the password will send a signal to central station of a password change SIA JV40 This is to inform the cen station of a possible attempt The installer must request the fol URL to default the password http tl 150 8328641 Only one TL150 can be enrolled on a local network any of the DRL IP Reporting IP Cypher Key Account Code fields are changed must reboot the module using the Reboot Module link at the bottom of page test transmissions also enables network supervision If the network con is down at the time of a test transmission a General System Supervisory will be triggered and the panel will go into trouble The trouble will be on the next successful communication with the receiver Setting this to zero disables network supervision entirely Only the following browsers are supported Internet Explorer Firefox Mozilla and WARRANTY Security Controls warrants that for a period of twelve months from the date of purchase the product shall be free of defects in and workmanship under normal use and that in fulfilment of any breach of such warranty Digital Security Controls shall at option repair or replace the defective equipment upon return of the equipment to its repair depot This warranty applies only to in parts and workmanship and not to damage incurred in shipping or handling or damage due to causes beyond the control of Security Controls such as lightning excessive voltage mechanical shock water damage or damage arising out of abuse alter or improper application of the equipment foregoing warranty shall apply only to the original buyer and is and shall be in lieu of any and all other warranties whether or implied and of all other obligations or liabilities on the part of Digital Security Controls Digital Security Controls neither responsibility nor authorizes any other person purporting to act on its behalf to modify or to change this warranty nor to for it any other warranty or liability concerning this product no event shall Digital Security Controls be liable for any direct indirect or consequential damages loss of anticipated profits loss of or any other losses incurred by the buyer in connection with the purchase installation or operation or failure of this product detectors can only detect motion within the designated areas as shown in their respective installation instructions They discriminate between intruders and intended occupants Motion detectors do not provide volumetric area protection They multiple beams of detection and motion can only be detected in unobstructed areas covered by these beams They cannot motion which occurs behind walls ceilings floor closed doors glass partitions glass doors or windows Any type of tam whether intentional or unintentional such as masking painting or spraying of any material on the lenses mirrors windows any other part of the detection system will impair its proper operation infrared motion detectors operate by sensing changes in temperature However their effectiveness can be reduced when the temperature rises near or above body temperature or if there are intentional or unintentional sources of heat in or near the area Some of these heat sources could be heaters radiators stoves barbeques fireplaces sunlight steam vents lighting so on Information Changes or modifications not expressly approved by Digital Security Controls could void the user to operate this equipment Digital Security Controls recommends that the entire system be completely tested on a regular basis However frequent testing and due to but not limited to criminal tampering or electrical disruption it is possible for this prod to fail to perform as expected COMPLIANCE STATEMENT Changes or modifications not expressly approved by Digital Security Controls could void your author to use this equipment equipment generates and uses radio frequency energy and if not installed and used properly in strict accordance the manufacturer instructions may cause interference to radio and television reception It has been type tested found to comply with the limits for Class B device in accordance with the specifications in Subpart of Part 15 FCC Rules which are designed to provide reasonable protection against such interference in any residential instal However there is no guarantee that interference will not occur in a particular installation If this equipment cause int erference to television or radio reception which can be determined by turning the equipment off and on user is encouraged to try to correct the interference by one or more of the following measures Re orient the receiving antenna Relocate the alarm control with respect to the receiver Move the alarm control away from the receiver Connect the alarm control into a different outlet so that alarm control and receiver are on different circuits necessary the user should consult the dealer or an experienced radio television technician for additional suggestions user may find the following booklet prepared by the FCC useful to Identify and Resolve Radio Television Problems This booklet is available from the U S Government Printing Office Washington D C 20402 004 000 00345 4 Digital Security Controls Canada cid 127 www dsc com Support 1 800 387 3630 Canada U S 905 760 3036 90 0 71 9 0 R0 0 1 in Canada Instruccciones de Instalaci Residencial Del Alarmar del IP manual se debe utilizar junto con el Manual de instalaci del panel de control 65 mA de Conexiones La conexi de KEYBUS de 4 cables es utilizada por el panel para con el m Conecte los terminales RED BLK YEL y GRN en los KEYBUS en un panel PowerSeries Requiere un cable UTP de 8 conductores con un conector RJ 45 en el Este cable es necesario para conexi en una puerta disponible en un u otra red servidora DHCP Conectar un M a un Panel de Control Conecte el m al Keybus con el panel desconectado de la electricidad Conecte un cable UTP de 8 conductores con un conector RJ 45 en un disponible de un router conmutador o concentrador con un servi DHCP disponible


