DSC TBZ48A - Installation Guide - En

File Preview
Click below to download for free
Click below to download for free
File Data
| Name | dsc-tbz48a-installation-guide-en-9463827015.pdf |
|---|---|
| Type | |
| Size | 975.81 KB |
| Downloads |
Text Preview
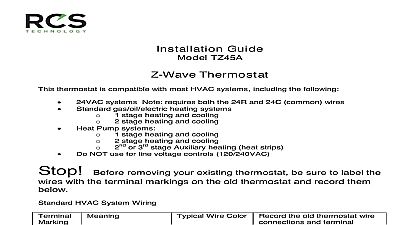
Installation Guide TBZ48A Powered Z Wave Thermostat thermostat is compatible with most HVAC systems including the following systems Note requires both the R and C wires unless battery powered gas oil electric heating systems stage heating and cooling stage heating and cooling Pump systems stage heating and cooling stage heating and cooling or 3rd stage Auxiliary heating heat strips NOT use for line voltage controls 120 240VAC an existing Thermostat Before disconnecting wires from the existing thermostat label wires with the terminal markings from the old thermostat and record below Take a picture will be very helpful with troubleshooting or you need to reinstall the old unit all instructions before starting installation Wire Color Record the old thermostat wire HVAC System Wiring Return 24VAC Common Fan or W1 Heat stage 1 or Y1 Cool stage 1 Heat stage 2 Cool stage 2 Pump HVAC System Wiring and terminal here Wire Color Record the old thermostat wire Common Return Fan or W1 Aux Heat or Y1 Compressor stage 1 Yellow or B Compressor stage 2 Black if you have a terminal marked with a brown wire attached to it that means you have a CO with heating type heat pump system Be sure to set the change over in the SYSTEM menu to CO type H heat Otherwise leave it set to C cool and terminal here Over Valve brown 140 02121 02 1 Power TBZ48 can be operated by battery power or 24VAC Note If the thermostat is installed on a Z Wave network while it is battery it will operate as a Z Wave FLiRS endpoint device If it is installed on a Z Wave when it is 24VAC powered it operates as an always on Z Wave routing device the power method is changed after the thermostat is installed on a Z Wave network it be uninstalled and re installed so that the network knows what kind of powered it is Power TBZ48 can be powered by either two AA Alkaline batteries or four AA Alkaline The thermostat will operate for approximately one year on two AA Alkaline depending on the frequency of user operations and backlight operation on four AA Alkaline batteries will be approximately twice as long Always use batteries and replace in complete sets 2 or 4 at a time with new units Power thermostat can also be powered from the HVAC system Both the C wire 24VAC wire typically blue and the R wire 24VAC hot wire typically red are for 24VAC operation Do not install batteries if the thermostat is powered from 24VAC They are not for backup Cooling System HVAC Setup thermostat must be setup for the correct system type and configuration of the HVAC for proper operation HVAC System Settings thermostat is default setup for the following typical HVAC system configuration system type Standard gas electric fan type Gas heat heating stages one cooling stages one installed on this type of a HVAC system the System setup does not need to Proceed to the wiring installation installed on a Heat Pump HVAC system or any HVAC configuration other than the settings change the default HVAC system settings in the SYSTEM setup menu the default HVAC system setup thermostat normally displays the Thermostat Main Control Screen To change the HVAC system defaults select the Menu Screen and then select the SYSTEM Follow instructions below to access the SYSTEM screen button operation To conserve battery life the thermostat backlight off after a short time of no activity The first press of any button turns on the but does not initiate any action Press the button again to initiate the action If the backlight is already on button presses work with the first press 140 02121 02 2 80C select the Menu press the button once to ON the backlight press again hold for 5 Main Screen Thermostat Main Screen shows the basic thermostat settings and controls It allows to set the temperature setpoints and the operating modes of the HVAC system To the thermostat setup and other user options first select the Thermostat Menu the Thermostat Menu screen Menu Screen to the selected to back to the Thermostat the Menu Options the Thermostat Menu Screen is displayed use the Up or Down arrow buttons to through the following options choices are in the Display Line the Up Down to change the desired item then user preference settings firmware versions and Z Wave network information set the time and day install uninstall from Z Wave network HVAC system setup the HVAC default settings To change the HVAC system default scroll down to the SYSTEM item and press the Thermostat Operating Guide for the other menu item descriptions 140 02121 02 3 Menu SYSTEM menu is used to setup the thermostat for the correct HVAC system type System Type Standard Gas Electric or Heat Pump Type Gas Heating or Electric Heating Valve Type for Heat Pump Systems Changeover with Cooling or with press to exit SYSTEM is selected in the Menu options the following setup options will be in the text line the UP Down arrow buttons to scroll to the desired setting to change a setting The current setting for that selection will be the selection with the Up Down arrows Standard Gas Electric systems select This is the default setting Heat Pump systems use the Up Dn arrows to change to Gas g heat select This is the default setting Electric E heat use the Up Dn arrows to change to HP systems the fan type is automatically selected this selection is not used When the desired setting has been selected Press again to save it System Setup Settings System Type SYSTYPE Type FANTYPE For Standard HVAC systems only type depends on the heating system type Valve Type CO For Heat Pump HVAC systems only changeover or reversing valve is used to change from heating to cooling operation It either a changeover with cooling type or changeover with heating type Most are with cooling which is the default setting sure what type Changeover system Check the existing thermostat connections to determine this If the original system had an orange wire connected to an then this is a with cool system If there was a brown wire to a terminal then this is a over with heat system Set the CO accordingly If heating comes on when cooling is expected and vice versa change the type to the opposite setting System Settings Menu Advanced System Settings Menu provides for addition system setup options settings can affect system operation and should only be changed by qualified HVAC Advanced System Settings menu is accessed by holding down the FAN for 5 sec