DSC WS4959 - Installation Manual - English - 12-Function Wireless Key

File Preview
Click below to download for free
Click below to download for free
File Data
| Name | dsc-ws4959-installation-manual-english-12-function-wireless-key-3958401267.pdf |
|---|---|
| Type | |
| Size | 839.40 KB |
| Downloads |
Text Preview
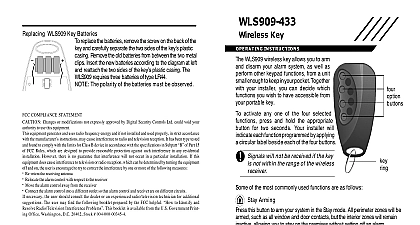
92 Wireless Keys 9 16 Partition Assignment OFF Option 1 ON 9 Partition2 OFF Option 8 16 Partition2 Partition1 3 Program Function Buttons 804 subsections 59 60 804 subsections 61 68 RF5501 433 v5.0 Partition 1 Wireless Key Options 61 Partition 1 Wireless Key Options RF5501 433 3 Button 1 Stay Arming 4 Button 2 Away Arming 7 Button 3 Disarm 0 Button 4 Panic 3 Button 1 Stay Arming 4 Button 2 Away Arming 7 Button 3 Disarm 0 Button 4 Panic 3 Button 1 Stay Arming 3 Button 1 Stay Arming 4 Button 2 Away Arming 4 Button 2 Away Arming 7 Button 3 Disarm 7 Button 3 Disarm 0 Button 4 Panic 0 Button 4 Panic other options please refer to your appropriate receiver manual Partition 2 Wireless Key Options 68 Partition 8 Wireless Key Options RF5501 433 the Batteries replace the battery remove the top cover by inserting a coin into the slot on the bottom right corner and twist Remove the screw at the of the board to expose the batteries Replace both batteries with CR 2025 lithium batteries see diagram normal conditions the batteries can last from 5 to 8 years During button press the key will send the status of its battery to the control receiver If the battery is low the trouble light on the controls panel s will turn ON The polarity of the battery must be observed as shown in the diagram above Improper handling lithium batteries may result in heat generation explosion or fire which may lead to personal injuries DANGER OF EXPLOSION IF BATTERIES ARE INSTALLED INCORRECTLY REPLACE WITH THE SAME OR EQUIVALENT TYPE RECOMMENDED BY THE MANUFACTURER Dis of used batteries must be made in accordance with the waste recovery and recycling regulations in your Do not try to recharge these batteries Keep batteries away from small children If batteries are swal promptly see a doctor Clip Assembly and Mounting PC4164 433 PC5132 433 RF5501 433 NT9005 433 32o to 120oF 0 49oC 5 93 RH Water Resistant COMPLIANCE STATEMENT Changes or modifications not expressly approved by Digital Security Controls could void your authority to use this equipment device complies with Part 15 of the FCC Rules Operation is subject to the following two conditions 1 This device may not cause interference and 2 this device must accept any interference received including interference that may cause undesired operation 160A WS4959 The term before the radio certification number only signifies that Industry Canada technical specifications were met Digital Security Controls Toronto Canada Support 1 800 387 3630 cid 127 www dsc com in Taiwan 9 0 0 7 0 5 1 R0 0 2 12 Function Wireless Key Instructions WS4959 is the industry s first 12 function remote control This will allow you to arm and disarm control garage doors and secu gates as well as a variety of other remote functions This is the remote to add to DSC s new garage relay module with inte laser parking RXL2 433 to control anything that can be ON or OFF of the WS4959 small center button on the WS4959 is used as a level shift to from functions 1 4 5 8 and 9 12 Press and hold the center button of the WS4959 Watch as the LED on the WS4959 changes from red to green to 1 3 2 4 and back to red The RED LED indicates functions 1 4 the GREEN LED indicates functions and the AMBER LED indicates functions 9 12 When you see the appropriate color LED release the center button The LED will pulsate that to indicate that you are in the appropriate functions Press one of the four buttons and the will stop flashing The WS4959 always defaults to functions 1 4 so it is not necessary to hold the center button to functions 1 4 If you are in Functions 5 8 or 9 12 the unit will time out after 5 seconds if no but are pressed Pressing and holding a key will continuously transmit that function default functions are as follows Arming this button to arm your system in the Stay mode All perimeter zones will be such as all window and door contacts but the interior zones will remain allowing you to stay on the premises without setting off an alarm Arming this button to arm your system in the Away mode Both the interior and exte zones will be armed allowing you to exit the premises this button to disarm your system You do not have to enter your access code you use the key to disarm the system this button to notify your central monitoring station of a situation requiring the such as a break in NOTE By default the user must press and hold the but for 3 seconds to activate the panic function requires a monitored account to Enroll the WS4959 following outlines the basic steps for programming and enrolling this device on PowerSeries For additional options or for other receivers please refer to the specific receiver installation 1 Program Electronic Serial Number ESN 804 subsections 41 56 Key 1 Enter the 6 digits ESN located on the back of the unit to enroll functions 1 4 Red LED mode To enroll functions 5 8 Green LED mode add 1 to the ESN and program in separate subsec Key 16 e g ESN 612345 1 becomes 612346 To enroll functions 9 12 Amber LED mode add 2 to the ESN and program in separate subsec e g ESN 612345 2 becomes 612347 2 Partition Assignment required if various modes operate on different partitions 804 subsections 91 92 804 subsection 69 RF5501 433 v5.0 Wireless Keys 1 8 Partition Assignment OFF Option 1 ON 1 Parition 2 Option 8 8 Parition 2 OFF Wireless Keys 1 16 Assignment 1 8 01 1 16 Wireless Keys 9 16 Partition Assignment OFF Option 1 ON 9 Partition2 OFF Option 8 16 Partition2 Partition1 3 Program Function Buttons 804 subsections 59 60 804 subsections 61 68 RF5501 433 v5.0 Partition 1 Wireless Key Options 61 Partition 1 Wireless Key Options RF5501 433 3 Button 1 Stay Arming 4 Button 2 Away Arming 7 Button 3 Disarm 0 Button 4 Panic 3 Button 1 Stay Arming 4 Button 2 Away Arming 7 Button 3 Disarm 0 Button 4 Panic 3 Button 1 Stay Arming 3 Button 1 Stay Arming 4 Button 2 Away Arming 4 Button 2 Away Arming 7 Button 3 Disarm 7 Button 3 Disarm 0 Button 4 Panic 0 Button 4 Panic other options please refer to your appropriate receiver manual Partition 2 Wireless Key Options 68 Partition 8 Wireless Key Options RF5501 433 the Batteries replace the battery remove the top cover by inserting a coin into the slot on the bottom right corner and twist Remove the screw at the of the board to expose the batteries Replace both batteries with CR 2025 lithium batteries see diagram normal conditions the batteries can last from 5 to 8 years During button press the key will send the status of its battery to the control receiver If the battery is low the trouble light on the controls panel s will turn ON The polarity of the battery must be observed as shown in the diagram above Improper handling lithium batteries may result in heat generation explosion or fire which may lead to personal injuries DANGER OF EXPLOSION IF BATTERIES ARE INSTALLED INCORRECTLY REPLACE WITH THE SAME OR EQUIVALENT TYPE RECOMMENDED BY THE MANUFACTURER Dis of used batteries must be made in accordance with the waste recovery and recycling regulations in your Do not try to recharge these batteries Keep batteries away from small children If batteries are swal promptly see a doctor Clip Assembly and Mounting PC4164 433 PC5132 433 RF5501 433 NT9005 433 32o to 120oF 0 49oC 5 93 RH Water Resistant COMPLIANCE STATEMENT Changes or modifications not expressly approved by Digital Security Controls could void your authority to use this equipment device complies with Part 15 of the FCC Rules Operation is subject to the following two conditions 1 This device may not cause interference and 2 this device must accept any interference received including interference that may cause undesired operation 160A WS4959 The term before the radio certification number only signifies that Industry Canada tech


