DSC WS8945 ENG FRE SPA

File Preview
Click below to download for free
Click below to download for free
File Data
| Name | dsc-ws8945-eng-fre-spa-2514786903.pdf |
|---|---|
| Type | |
| Size | 1.06 MB |
| Downloads |
Text Preview
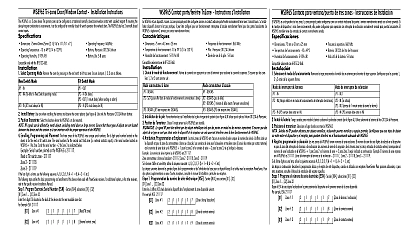
WS8945 Wireless Door Window Contact Instructions For Service Persons Only Installation Instructions shall be used in conjunction with the Installation Manual of the DSC wireless receiver and control with which this device is intended to be used the WS8945 your convenience the WS8945 comes with the battery pre installed To activate hold the WS8945 firmly in one hand and pull plastic tab in the direction indicated Transmitter the location where the WS8945 is to be mounted NOTE RF signals can be affected by metal objects including doors or large mirrors Such locations should be avoided as they can interfere with proper operation Programming and Placement the WS8945 by programming the 6 digit serial number located on the WS8945 into the receiver Once the WS8945 is you must perform a Module Placement Test to ensure the location you have chosen is suitable The following outlines basic steps for programming and enrolling this device on PowerSeries receivers For additional options or for other receivers refer to the specific receiver installation manuals 1 Program Electronic Serial Number ESN 804 subsections 01 32 Zone 1 32 Zone 32 the 6 digit ESN located on the WS8945 into the next available zone slot 2 Program Zone Definition 001 004 corresponding zone with appropriate zone type Ex Delay 01 Instant 03 etc 3 Enable Wireless Zone Attribute 101 132 Option 8 ON wireless zone attribute in corresponding zone attribute section All wireless devices must be Placement Tested for good signal strength 4 Device Placement Test 904 subsections 01 32 and close the contact by moving the magnet away from the WS8945 The panel will indicate test result through the siren and also through the keypad bell squawk beep on LCD keypad LED 1 on LED keypad indicates GOOD placement bell squawks beeps on LCD keypad LED 3 on LED keypad indicates BAD placement the transmitter tests BAD move the transmitter and repeat the Placement Test Test unit at least once yearly the WS8945 and Magnet you determine the proper location see Enrolling Programming and Placement the WS8945 can be permanently mounted It is the responsibility of the installer to ensure that the WS8945 is securely mounted in the intended Provided Screws Remove the back from the transmitter Mount the back housing of the WS8945 to the desired loca using the screws supplied Adhesive Tape Ensure you are attaching the WS8945 to a painted or primed surface that is clean and dry Apply the to the back of the WS8945 and attach to the surface using firm pressure Hold for 10 15 seconds to ensure a strong bond It take up to 24 hours for the tape to reach maximum bonding strength NOTE If surface conditions are unsuitable the WS8945 with mounting screws provided the magnet with the arrow on the WS8945 housing see Figure C Mount the magnet a maximum of 5 8 1.6cm from WS8945 by using the provided tape or screws If necessary use the spacers provided Once the WS8945 and magnet are open and close the window door to ensure that neither of the parts causes interference Only one magnet can be used each WS8945 External Contacts external contact terminals can be used to connect external contacts or other switches devices to the universal transmitter the additional device as per the manufacturer instructions Connect the device to the contact terminals of the WS8945 The is normally closed and is not supervised wires connecting the external device to the input terminals must not exceed 3ft 90 cm in length provided that the resistance the wire does not exceed 100 Ohms The contact and transmitter must also be in the same room Only one contact can be used an external contact is used do not install the magnet Ensure all wiring is stripped to 1 4 6mm max and does not touch any of the components Switch WS8945 comes equipped with case tamper detection If the case is removed the WS8945 will report a zone tamper to the panel For added security the WS8945 was designed to provide wall tamper monitoring as well Simply replace the short actuator see Figure D with the longer one that is included this option if the case is opened or if the WS8945 is removed from it location a tamper will be sent to the control panel It strongly recommended that mounting screws be used when using the wall tamper option the Battery replace the battery insert a flathead screwdriver into either side of the unit and carefully twist to separate the top and bottom see Figure A Once separated the battery will be visible see Figure B Remove the old battery and install a new one correct polarity is observed Dispose of the used battery promptly The battery used in this device may present a fire or chemical burn hazard if mistreated not recharge disassemble heat above 100C 212F or dispose of in fire Replace battery with one lithium battery Panasonic CR2 or Duracell CR2 only Use of another battery may present a risk of or explosion Dispose of the used batteries as per local regulations Keep away from children Contact miniature pour Porte Fen d pour le personnel de service seulement manuel d doit utilis en conjonction avec le manuel d du r sans fil DSC et du panneau de contr pour ce dispositif a con en marche du WS8945 vous faciliter la t le WS8945 est livr avec la pile pr Pour activer tenir fermement le WS8945 dans une main et tirer la en plastic dans la direction indiqu de le WS8945 l ou le WS8945 sera install REMARQUE Le signal RF peut affect par des objets m que des portes en m ou des miroirs importants Ce genre d doit car ces objets peuvent interf le bon fonctionnement du dispositif Programmation et Emplacement le WS8945 en programmant le r avec le num de s 6 chiffres situ sur le WS8945 Une fois que le WS8945 est vous devez effectuer un essai de placement de module pour assurer que l choisi convient Pour de plus amples rensei veuillez consulter le manuel d de votre r Voici les grandes lignes des fondamentales pour la program et l de ce dispositif sur les r de la PowerSeries Pour des options suppl ou pour d r consulter le manuel d de votre r 1 Programmez le Num de s NS 804 sous sections 01 32 Zone 1 32 Zone 32 le NS 6 chiffres situ sur le WS8945 dans l de zone libre suivant 2 Programmez la D de zone 001 004 la zone correspondante avec le type de zone appropri par ex D 01 Instantan 03 etc 3 Activez l de zone sans fil 101 132 l 8 MARCHE attribut de zone sans fil dans la section d de zone correspondante Tous les dispositifs sans fil doivent essay pour assurer une bonne intensit du signal de l o ils install 4 Essai de placement de dispositifs 904 sous sections 01 32 et fermez le contact en l du WS8945 Le panneau indiquera le r de l de la sir et du clavier son de sir ou clavier DEL 1 indique un BON placement sons de sir ou clavier DEL 3 indique un MAUVAIS placement l donne de MAUVAIS r d l et recommencez l de placement du WS8945 et de l fois que vous avez d un emplacement appropri voir Attribution Programmation Placement le WS8945 peut fix de permanente NOTE Il est de la responsabilit de l de s que le WS8945 est solidement mont l pr les vis fournies Retirez la plaque arri de le WS8945 Fixez a l d la plaque arri du coffret de le WS8945 les vis fournies le ruban adh double face Assurez le WS8945 est mont sur une surface peinte ou appr qui est propre et s Mettez ruban au dos du WS8945 appuyez et maintenez fermement l d pendant environ 10 15 secondes Le ruban adh prendre 24 h pour atteind