Edwards SuperDuct Four-Wire Controller RJ-45 Version

File Preview
Click below to download for free
Click below to download for free
File Data
| Name | edwards-superduct-four-wire-controller-rj-45-version-1632859047.pdf |
|---|---|
| Type | |
| Size | 958.75 KB |
| Downloads |
Text Preview
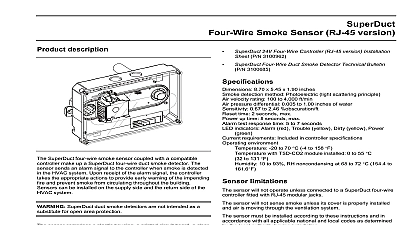
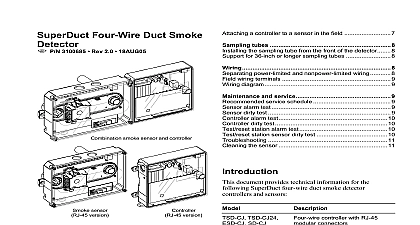
description SuperDuct four wire controller coupled with a compatible sensor up a SuperDuct four wire duct smoke detector The sensor an alarm signal to the controller when smoke is detected in the system Upon receipt of the alarm signal the controller takes appropriate actions to provide early warning of the impending fire prevent smoke from circulating throughout the building The can be configured for a range of operating voltages and one or two compatible sensors SuperDuct duct smoke detectors are not intended as a for open area protection controller comprises a plastic housing a printed circuit board and clear plastic cover The clear plastic cover is secured to the housing a single captive screw for easy access to the wiring terminals are provided to route wires into the controller housing controller contains no user serviceable parts document provides installation instructions for the following four wire controllers ESD CJ SD CJ Four wire controller with RJ 45 modular ESD 4WJ controller with RJ 45 connectors and cover gasket four wire controller and with RJ 45 modular connectors product will not operate without at least one compatible sensor table below lists the compatible four wire smoke sensors that you use with the controllers listed above sensor TSD CJG TSD 4WJ TSD SJG TSD SJCO2 ESD 4WJ SD 4WJ The TSD CO2 module has not been performance evaluated to 2075 or approved by ULC Controller RJ 45 version documents addition to this document information about sensor installation and smoke detector testing and maintenance can be found in the Four Wire Smoke Sensor RJ 45 version Installation P N 3100686 Four Wire Duct Smoke Detector Technical Bulletin 3100685 6.75 x 5.45 x 1.90 inches with detector 14.51 x 5.45 x 1.90 inches size voltage terminals 12 to 22 AWG others 14 to 22 AWG indicators Alarm red Trouble yellow Power green initiation relay 1 Normally open 2.0 A at 30 Vdc resistive relay 2 Form C 10 A at 30 Vdc 10 A at 250 Vac contacts must switch a of 100 mA at 5 Vdc trouble relay 1 Form C 2.0 A at 30 Vdc resistive output 18 Vdc nom 30 mA max module output 0 to 10 Vdc 0 to 2,000 ppm environment 20 to 70 4 to 158 with TSD CO2 module installed 0 to 55 32 to 10 to 93 RH noncondensing at 68 to 72 154.4 to voltages 20 to 29 Vdc 15 to 10 24V 15 to 10 at Hz 120V 15 to 10 at 50 60 Hz 220 240V 15 to 10 50 60 Hz currents See table below voltage current current Vdc V at 50 Hz V at 60 Hz V at 50 Hz V at 60 Hz V at 50 Hz V at 60 Hz mA mA mA mA mA mA mA mA mA mA mA mA mA mA The TSD CO2 module has not been performance evaluated to 2075 or approved by ULC guidelines in accordance with all applicable national and local codes as by the local authority having jurisdiction not install a controller more than 15 feet away from a sensor Sheet Four Wire Controller RJ 45 version P N 3100687 REV 2.0 4 all field wiring through the knockouts located on the bottom of the housing Maintain a 1 4 inch separation between power and nonpower limited wiring at all times instructions read these instructions thoroughly before installing In addition this document important information can be found in Technical P N 3100685 1 Mount the controller the controller on a flat section of HVAC duct or sheet metal as in Figure 1 using the sheet metal screws provided in the kit The controller does not have to be mounted next to the nut by installer duct coupling by installer 3 Conduit support plate installation configuration the controller configuration jumpers as described below Failure to remove JP1 prevents the controller from indicating a condition with the sensor connected to J2 It does not prevent controller from responding to an alarm signal sheet metal screw 1 Controller mounting diagram you are installing a controller combined with a sensor mount both on flat section of HVAC duct as shown in Figure 2 JP3 4 Controller jumper locations jumper settings connected to one sensor factory connected to two sensors duct sheet metal screw 2 Mounting a controller combined with a sensor 2 Attach the conduit support plate the controller and remove the terminal block cover Attach the support plate as shown in Figure 3 JP3 jumper settings connected to 24 Vdc 24 Vac or Vac factory setting connected to 220 240 Vac 3100687 REV 2.0 4 Sheet Four Wire Controller RJ 45 version to sensor wiring the controller to the sensor as shown in Figure 5 Make sure cable grommets are seated securely into their respective openings cable assembly separately sensor second sensor 5 Controller to sensor wiring diagram cable assemblies are available in the lengths listed below wiring harness kit 5 ft wiring harness kit 10 ft wiring harness kit 15 ft strain relief is required secure the cable using the cable clamps with the cable kit you are connecting the controller to two sensors remove JP1 wiring all field wiring into the controller through the knockouts on the of the housing as shown in Figure 6 Keep all power limited in the shaded area and all nonpower limited wiring in the area is not shaded the terminal block cover and connect the field wiring as shown Figure 8 Replace the terminal block cover when finished Maintain a 1 4 inch separation between power limited and wiring at all times cable assembly separately 6 Power limited and nonpower limited wiring areas 7 shows the terminal block cover that is installed on the The markings identify the function and number of the screw found underneath N C N O FOR 230VAC INSTALL SHEET N O COM AUX HIGH VOLTAGE 7 Terminal block cover completing the installation test the controller to ensure that it is correctly before leaving the site For details refer to Bulletin P N 3100685 Sheet Four Wire Controller RJ 45 version 3100687 REV 2.0 4


