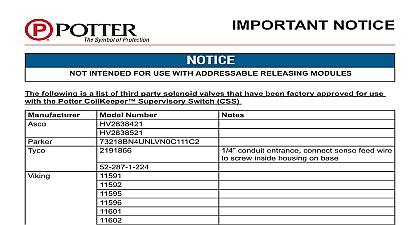
Potter CoilKeeper™ Solenoid Supervisory Switch

File Preview
Click below to download for free
Click below to download for free
File Data
| Name | potter-coilkeeper-solenoid-supervisory-switch-1328497065.pdf |
|---|---|
| Type | |
| Size | 1.60 MB |
| Downloads |
Text Preview
Features Coil monitoring on preaction deluge system solenoids Ability to show coil state through simple LEDs Detects open and shorted coils Can be mounted at the solenoid or remotely Provides visual indication of coil and the releasing circuit status document contains important information on the installation operation of the Coil Supervisory Switch Please read all carefully and notify the building owner or their representative before any work is done on the fire or fire alarm system A copy of this document is by NFPA 72 to be maintained on site CoilKeeper Supervisory Switch CSS is designed to supervise the of a coil on a solenoid for a preaction deluge system as required NFPA 13 The unit monitors the coil electronically and determines if coil is installed on the valve stem If a technician removes the coil the stem the CoilKeeper will activate a normally open set of dry that can be wired to a supervisory circuit of the releasing control LEDs at the CoilKeeper shows when the coil is in a normal state the valve body when the coil is removed from the valve body in maintenance state when the releasing circuit is energized and if the is open or shorted The releasing circuit energized LED allows the to locally see the state of the circuit preventing accidental by re installing an energized coil must be performed by qualified personnel and in accordance with all national and local codes and ordinances hazard Disconnect power source before servicing Serious injury or death could result all instructions carefully and understand them before starting installation Save instructions for future use Failure to read and understand instructions could result in improper operation of device resulting in serious injury or death of explosion Not for use in hazardous locations Serious injury or death could result Pending Specifications Entrances Ratings Limitations NEMA type 2 for indoor dry use conduit connections provided 3 total at 30 VDC Resistive W x 4.00 H x 1.90 D and impact resistant polycarbonate Requirements Weight Valves Range Range VDC 20 mA max standby 40 mA max alarm 20 mA power 20 mA releasing circuit lbs use with 24V solenoid valves UL listed for releasing 9 11 watts F to 120 0 to 49 AWG subject to change without notice PAGE 1 OF 6 Supervisory Switch5401604 REV C 2 21Potter Electric Signal Company LLC St Louis MO Phone 800 325 3936 www pottersignal comfirealarmresources com Return Clamp Installation Figure 2 Position the return clamp around the wrenching flats of the Mounting location should have parallel flat edges With the valve centered in the bracket adjust the set screw it is touching the valve For larger valves the locknut can be moved to the of the U bracket for more clearance Tighten the locknut to prevent the set screw from moving Adjust the lock screw until the bracket is securely connected to valve Attach the blue sense return wire to the set screw using the ring terminal washer and nut On Valve Mounting 1 feed wire feed bracket collar tight grip return wire return clamp Return Clamp 2 1 2 solenoid not included Valve Body Valve Installation Feed Bracket see Figure 1 Wire Valves The sense feed bracket is not required on 3 wire Wire Valves conduit nut onto supplied 1 2 pipe nipple or other 1 2 as needed sense feed bracket onto nipple with screw facing coil Thread nipple into solenoid valve and tighten conduit nut Check that there is continuity between the solenoid coil collar sense feed bracket Attach yellow sense feed wire using provided ring terminal and to the sense feed bracket CoilKeeper on valve using supplied 1 2 pipe nipple and as shown in Figure 1 or other 1 2 nipple as needed CoilKeeper can be mounted using any of the 3 conduit and rotated to ensure clearance of trim piping Install tight cord grip into CoilKeeper housing Do not tighten outer at this time Installation Figure 3 out mounting holes using a 7 bit Secure CoilKeeper housing mounting surface using 10 screws and appropriate anchors not Feed Bracket Wire Valves The sense feed bracket is not required on 3 wire Wire Valves sense feed bracket onto conduit fitting or pipe nipple as with screw facing solenoid coil Thread fitting into solenoid valve and tighten conduit nut Check that there is continuity between the solenoid coil collar sense feed bracket Attach yellow sense feed wire using provided ring terminal and to the sense feed bracket nonmetallic junction box to fitting or nipple nonmetallic conduit from the solenoid valve to the to use nonmetallic conduit junction box may cause operation of the CoilKeeper Feed Sense Return Conduit a junction box within 5 feet of the solenoid valve supplied liquid tight cord grip conduit from the junction box to the CoilKeeper Maximum wire resistance 100 ohms INCH MILLIMETERS DIMENSIONS FOR REFERENCE ONLY Screw Screw Bracket A 1 1 PAGE 2 OF 6 DIMENSIONS FOR REFERENCE ONLY REV C 2 21Potter Electric Signal Company LLC St Louis MO Phone 800 325 3936 www pottersignal comCoilKeeper Supervisory Switchfirealarmresources com Remote Mounting 3 not box included tight grip return Feed Return feed wire box included feed bracket 1 2 solenoid not included return PAGE 3 OF 6 REV C 2 21Potter Electric Signal Company LLC St Louis MO Phone 800 325 3936 www pottersignal comCoilKeeper Supervisory Switchfirealarmresources com Feed and Return Wiring Push the un stripped sense feed and sense return wires through grip Supplied cord grip has opening for 3 wires proper routing and slack of sense feed and return wires coil can be removed from valve without strain on wires Cut excess wiring and tighten the outer nut of cord grip to wires Wire Valves Wire solenoid ground to sense feed terminal on CoilKeeper Wire ground to sense return terminal if required by NEC local code or AHJ coil valve assembly is grounded through the sense return clamp on releasing circuit may indicate improper wiring of line device must be installed between REL EOLD SOL EOLD terminals to releasing panels manual for end of line device types of line devices show in diagram are for reference and not in addition to those required by the releasing panel for Do not wire ground to CoilKeeper when using 2 wire solenoid excess wiring does not interfere with the reset switch LEDs when cover is installed PAGE 4 OF 6 REV C 2 21Potter Electric Signal Company LLC St Louis MO Phone 800 325 3936 www pottersignal comCoilKeeper Supervisory Switchfirealarmresources com Connections Plate uninsulated section of a single conductor should not be looped around terminal and serve as two separate connections The wire must be thereby providing supervision of the connection in the event that wire becomes dislodged from under the terminal Failure to sever the may render the device inoperable risking severe property damage and of life not strip wire beyond 3 8 of length or expose an uninsulated conductor the edge of the terminal block When using stranded wire capture strands under the clamping plate the building owner or their representative before testing CoilKeeper Testing of the CoilKeeper will result in a condition on the releasing panel which may be


