Simplex 4120 8-Volt DC-to-DC Converter Installation Instructions

File Preview
Click below to download for free
Click below to download for free
File Data
| Name | simplex-4120-8-volt-dc-to-dc-converter-installation-instructions-3610942875.pdf |
|---|---|
| Type | |
| Size | 1.23 MB |
| Downloads |
Text Preview
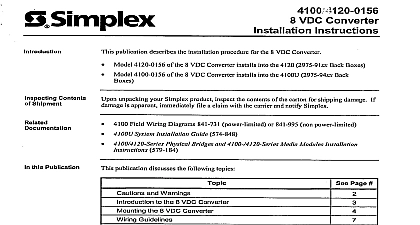
4120 Network DC to DC Converter Checkout and Warnings NOT INSTALL ANY SIMPLEX PRODUCT THAT APPEARS Upon unpacking your Simplex product inspect the contents of carton for shipping damage If damage is apparent immediately file a claim the carrier and notify Simplex HAZARD Disconxrect electrical power when making any adjustments or repairs Servicing should be performed by qualified Representatives FREQUENCY ENERGY This equipment generates uses and can radio frequency energy and if not installed and used in accordance with instruction manual may cause interference to radio communications It has tested and found to comply with the limits for a Class A computing device to Subpart J of Part 15 of FCC Rules which are designed to provide protection against such interference when operated in a commercial Operation of this equipment in a residential area is likely to cause in which case the user at his own expense will be required to take measures may be required to correct the interference Simplex 4 120 S Volt DC to DC Converter is an option card that mounts a 4120 Fire Alarm Control Panel FACP or a Universal Transponder This card takes 24VDC power from the system switching power supply converts it to 8VDC to provide an additional source of S Volt power for a 4120 Physical Bridge bay table below shows the maximum number of Style 7 and Style 4 bridges that be mounted in a bay For example with four Style 7 bridges no Style 4 can be used With two Style 7 bridges up to three Style 4 bridges can used With one Style 7 bridge up tofie Style 4 bridges can be used Documentation following is a list of additional documentation that may assist you in the of the S Volt DC to DC Converter Interconnect Diagram Wall Mount Panel 841 869 I20 Network Physical Bridge Installation and Instructions 574 089 1997 Simplex Time Recorder Co specifications were current as of publicatzon and are subject change without notice 23 A Requirements 4020 4 100 4120 versions of the S Volt DC to DC Converter have the power requirements Input PCB Black Connector position 1 PCB Red Connector position 2 max at 20VDC after one minute of operation S Volt DC to DC Converter has the following environmental limitations to 122 F 0 to 50 C to 95 relative humidity noncondensing at 93 F C Converter Kit 4120 8 Volt DC Open the cabinet door See Figure 1 Disconnect the green ground w ire between the cabinet door and the cabinet present and set it aside Remove the cabinet door and set it aside Door 1 Opening Cabinet Door on next page 4120 Volt DC Converter Kit Remove the screws holding the cabinet retainer in place and remove the Set the cabinet retainer and the holding screws aside Figure 2 Retainer 2 Removing Cabinet Retainer Disconnect one of the two battery terminals then remove AC power at the source on next page 4120 Volt DC Converter Kit Remove the two pins holding the card retainer on the expansion bay the Physical Bridge and lower the retainer See Figure 3 Pin Pin w Pin 3 Expansion Card Retainer Remove the screw holding the retainer restraint to the card retainer and set aside Remove the two card retainer hinge pins and remove the card retainer Set card retainer and pins aside on next page Converter Kit 4120 8 Volt DC Remove two screws holding the left expansion bay bracket Figure 4 and the bracket Set the two screws aside Expansion Bracket 4 Expansion Bay Bracket on next page 4120 8 Volt DC Converter Kit tin ued Using three 426 047 screws and 268 009 lockwashers supplied secure the DC to DC Converter to the 635 95 1 Expansion Bay End Bracket Figure 5 holes on the Volt DC to DC Converter bracket may not align the holes on some olde r versions of the Expansion Bay End In this case drill new holes in the Expansion Bay End before mounting the S Volt DC to DC Converter Screw Lockwasher Converter 5 Mounting 8 Volt DC to DC Converter the End on next page Converter Kit 4120 8 Volt DC Install the bracket with the attached Converter on the left side of the bay the two screws set aside in Step 9 See Figure 6 6 Installing End Bracket on next page Replace the card retainer and pins removed in Step 8 See Figure 7 4120 8 Volt DC Converter Kit Pin Retainer Screw 7 Replacing Card Retainer Replace the screw set aside in Step 7 holding the retainer restraint to the retainer Wire the Converter into the sys tem For more information refer to the 8 Volt DC to DC Converter into the System which follows section on next page 8 Volt DC to DC the System to the 841 73 1 Field Wiring Diagram see Appendix A and Figure 8 the 8 Volt DC to DC Converter Detail A into the system in accordance the following procedure the CPU bay retainer the 733 94 1 Harness Assembly to TB2 on either the CPU Power Detail B or an expansion power supply using the A tap of the CPU power supply connect the RED wire of 733 94 1 Harness Assembly to TB2 12 Connect the BLACK wire of 733 941 Harness Assembly to TB2 10 using the B tap of the CPU power supply connect the RED wire of 733 941 Harness Assembly to TB2 8 Connect the BLACK wire of the Harness Assembly to TB2 6 Supply 8 Wiring 4120 8 Volt DC to DC Converter System Procedure the installation is completed verify that the s Volt DC to DC Converter functioning correctly by doing the following Apply AC power Do not connect the batteries Test the output voltage Terminal Block Position 3 Terminal Block Position 5 Voltage is 8VDC 5 percent including ripple of 1 OOmV peak to spiking at 500mV p p the Converter responses are satis ctory perform the following steps Disconnect the AC power to the panel the plug of the 733 940 Harness Assembly into P3 on the leftmost Motherboard Assembly Make sure that there are no other or COMM harnesses connected to the Physical Bridge bay Apply AC power and reconnect the batteries Check out the Physical Bridge cards Refer to Publication 574 089 1120 Physical Bridge InstaIlation and Checkout Instructions the Physical Bridge responses are satisfactory perform the following steps Close the CPU Bay retainer Close the Expansion Bay retainer Replace the cabinet retainer and the retainer holding screws Replace the cabinet door Reconnect the green ground wire if removed between the cabinet door the cabinet Close and lock the cabinet door service call your local Simplex Time Recorder Company Branch Office A Wiring Diagrams This Appendix appendix contains the following Field Wiring Diagrams for the 8 Volt DC Converter installation Wiring Diagram No Style 7 And Style 4 Power Limited Style 7 And Style 4 Non Power Limited 1