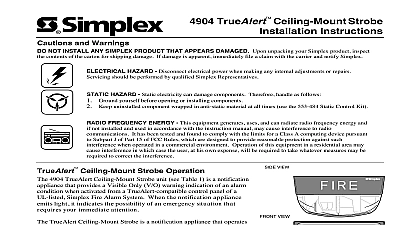
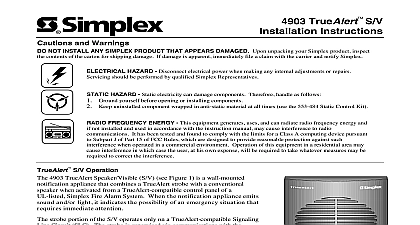
Simplex 4903 TrueAlert Ceiling-Mount AV Installation Instructions

File Preview
Click below to download for free
Click below to download for free
File Data
| Name | simplex-4903-truealert-ceiling-mount-av-installation-instructions-2381579460.pdf |
|---|---|
| Type | |
| Size | 1.02 MB |
| Downloads |
Text Preview
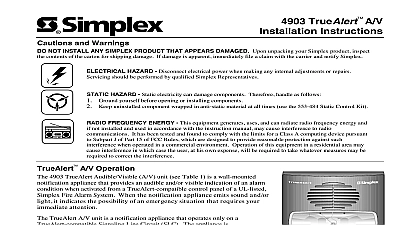
4903 TrueAlert Ceiling Mount A V Instructions and Warnings NOT INSTALL ANY SIMPLEX PRODUCT THAT APPEARS DAMAGED Upon unpacking your Simplex product inspect contents of the carton for shipping damage If damage is apparent immediately file a claim with the carrier and notify Simplex HAZARD Disconnect electrical power when making any internal adjustments or repairs should be performed by qualified Simplex Representatives HAZARD Static electricity can damage components Therefore handle as follows Ground yourself before opening or installing components Keep uninstalled component wrapped in anti static material at all times use the 553 484 Static Control Kit FREQUENCY ENERGY This equipment generates uses and can radiate radio frequency energy and not installed and used in accordance with the instruction manual may cause interference to radio It has been tested and found to comply with the limits for a Class A computing device pursuant Subpart J of Part 15 of FCC Rules which are designed to provide reasonable protection against such when operated in a commercial environment Operation of this equipment in a residential area may interference in which case the user at his own expense will be required to take whatever measures may be to correct the interference Ceiling Mount A V Operation 4903 TrueAlert Audible Visible A V unit see Figure 1 is a notification appliance that provides an audible and or visible indication of an alarm condition when activated from a TrueAlert control panel of a UL listed Simplex Fire Alarm System When the appliance emits sound and or light it indicates the possibility of emergency situation that requires your immediate attention TrueAlert A V unit is a notification appliance that operates only on a Signaling Line Circuit SLC The appliance is via communications with the TrueAlert Addressable Controller than via conventional appliance supervision Ceiling Mount TrueAlert A V unit responds to communication signals over the circuit from a TrueAlert compatible Coded messages from the TrueAlert Addressable Controller turn on the A V strobe and horn The Strobe can be operated through a 4009 9401 TrueAlert Addressable Controller using Simplex TrueAlert Comm Channel The appliance is supervised via communications with the TrueAlert controller rather than via current flow supervision A V horn provides selectable high low volume sound pressure levels with audible output types of Steady Temporal and Time fast slow The compatible 4009 TrueAlert Addressable Controller or FACP is used to configure the features The TrueAlert Ceiling Mount A V will not operate on a conventional NAC ceiling mount A Vs are available rated at 15 candela 75 candela and 110 candela Table 1 lists the available A V models 1 TrueAlert Ceiling Mount A V 1 Ceiling Mount TrueAlert A V Models Description A V 15 CANDELA A V 75 CANDELA A V 110 CANDELA Model 4903 9459 4903 9460 4903 9461 Cover Color White 2000 Simplex Time Recorder Co Westminster MA 01441 0001 USA specifications and other information shown were current as of publication and are subject to change without notice is a trademark of Simplex Time Recorder Company or following an eight digit product ID number denotes ULC listed product B Ceiling Mount A V Wiring Make sure that all electrical power is disconnected before starting the installation wiring to terminals as shown Do not loop wires under terminals Break wire runs to provide of connections Do not bring conduit through the rear of the electrical box Strip lead insulation to maximum of 3 8 inch At the electrical box connect the wires to the CKT and CKT terminals at the rear of the A V unit Torque terminal screws 12 15 in lbs to ensure proper continuity See Figure 2 Ensure that correct polarity is maintained for each A V unit SLC wiring must be twisted pair TWP TERMINALS ACCEPT WIRES 12 18 AWG TWP NOTE 3 INPUT INPUT SWITCH TrueAlert COMPATIBLE CONTROLLER NOTES A Wiring See Notes NEXT APPLIANCE OR SLC NOTES TrueAlert COMPATIBLE CONTROLLER NOTES B Wiring See Notes Maximum 43 appliances per circuit Maximum 30 ohms wire resistance between appliances Refer to Field Wiring Diagrams of the driving compatible Fire Alarm Control Panel for further instructions Notification appliances are rated per individual nameplate label Maintain correct polarity on terminal connections Do not loop wires under terminals All TrueAlert SLC wiring connections are supervised and power limited appliances were only tested to the operating voltage limits of 17V to 31V Do not operate these appliances outside these limits doing so cause appliance to fail to operate as intended and or cause permanent damage to this equipment TrueAlert A V can only be operated through a 4009 TrueAlert Addressable Controller or TrueAlert compatible FACP is not allowed for Class A wiring 2 TrueAlert Ceiling Mount A V Wiring the TrueAlert Ceiling Mount A V Figure 3 for mounting the TrueAlert ceiling mount A V to the enclosure box Do not bring conduit through the rear of the electrical box Tighten mounting screws snugly do not overtighten Torque mounting screws 5 7 in lbs For flush mounting install the box either flush with the ceiling or with a maximum recess SCREW HOLES FOR SQUARE MOUNTING NOTES SWITCH SW1 NOTE 4 SQUARE BOX SUPPLIED DEEP REQUIRED NOTES CEILING A V FROM 748 472 GROUP QTY 2 SCREWS TrueAlert Ceiling Mount A V attaches directly to a 4 inch square electrical box not supplied semi flush or surface mounted Ensure orientation of the box in relation to the location of the mounting screws and the A V position installation in a concrete or plaster ceiling flush mount the box with a recess maximum installation in a suspended ceiling use a suitable tile bridge that rests on tile to support the box Address Switch SW1 is accessible with the Ceiling Mount A V removed 3 TrueAlert Ceiling Mount A V Mounting the Ceiling Mount A V Address TrueAlert notification appliance has a unique address Each appliance address is set via an eight position DIP as shown in Table 2 see Figure 3 for the general DIP switch location DIP switch position 1 is the least bit LSB and position 8 is the most significant bit MSB DIP Switches 1 through 6 are used to set the possible 63 address codes DIP Switches 7 and 8 are not used and set to a small screwdriver or pen to set the switches and then record the address This information provides an aid in the system 2 TrueAlert Ceiling Mount A V Units DIP Switch Address Chart SWITCH SHOWN IS AT ADDRESS 7 ON OFF USED FOR USE SWITCHES 5 AND 6 THRU 4 A V Magnetic Test The TrueAlert Addressable Controller must be configured to support the A V diagnostic testing magnet tester 553 810 to the bottom right side of the A V cover near LED indicator see Figure 4 Hold the magnet tester in place for a of two seconds or until the LED begins flashing