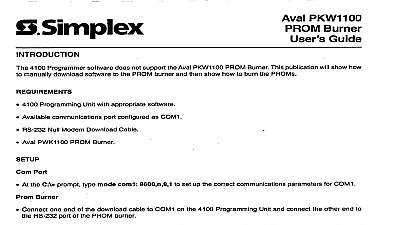
Simplex Aval PKW 1100 PROM Burner - Users Guide

File Preview
Click below to download for free
Click below to download for free
File Data
| Name | simplex-aval-pkw-1100-prom-burner-users-guide-6419803257.pdf |
|---|---|
| Type | |
| Size | 724.92 KB |
| Downloads |
Text Preview
Aval PKW1100 PROM Burner Guide 4100 Programmer software does not support the Aval PKW1100 PROM Burner This will show you how to manually download software to the PROM burner and then you how to burn the PROMs Programming Unit with appropriate software Available communications port configured as COM1 RS 232 Null Modem Cable Aval PWK1100 PROM Burner this Publication publication discusses the following topics Page the C prompt type mode com1 9600 n 8,1 to set up the correct communications for COM1 one end of the download cable to COM1 on the 4100 Programming Unit and connect the end to the RS 232 port of the PROM burner Steps 1 through 9 to verify the setup on the PROM burner Figures 1 through 9 represent displayed on the PROM burner LCD Actual screen information may differ from illustrations Turn the PROM burner ON Unit beeps and Figure 1 appears AUTO 9 F 1 Port Burner 2001 Simplex Time Recorder Co Westminster MA 01441 USA specifications and other information shown were current as of publication and are subject to change without notice A Verify that the Bit Form selection is set to D8 S1 No by pressing SET and 0 Figure 2 appears with D8 S1 No blinking To change the option press the or button until desired option is blinking Select the blinking by pressing JOB Verify that the Xon Xoff selection is set to RTS CTS by pressing SET and then Figure 3 appears with RTS CTS blinking To change the option press the or button until desired option is blinking Select the blinking by pressing JOB Verify that the Format selection is set to Motorola by pressing SET and then 5 Figure 4 appears with Motorola blinking To change the option press the or button until desired option is blinking Select the blinking by pressing JOB Form D8 S1 Odd S1 Evn D8 S1 No or S2 Odd 2 or RTS CTS 3 or Tekhex Tekhex Motorola hex 4 Verify that the T R speed is set to 9600 by pressing SET and then 1 Figure 5 appears with 9600 blinking To change the option press the SET button until desired option is blinking Select the blinking option by JOB Verify that the Device Maker is set to AUTO by pressing JOB SET 1 and 0 Figure 6 appears with AUTO blinking To change the option press the or button until desired option is blinking Select the blinking by pressing JOB In approximately 10 seconds the screen will to Device Item No with options 0 3 At this time press Verify that the Check sum is set to Normal by pressing JOB and then 7 Figure 7 appears with Normal blinking To change the option press the or button until desired option is blinking Select the blinking by pressing JOB If the screen displays error ignore this and continue Verify that the Margn chk is set to Enable by pressing JOB SET and 3 Figure 8 appears with Enable blinking To change the option press the or button until desired option is blinking Select the blinking by pressing JOB speed 75 9600 or 5 or AUTO 6 sum Normal or 7 chk Enable or 8 Software Verify that the Word type is set to Even Low by pressing JOB SET and 8 Figure 9 appears with Even Low blinking To change the option press the or button until desired option is blinking Select the blinking by pressing JOB type or Even Low 9 Steps 10 through 17 to manually download CFIG software Figures 10 15 represent screens displayed on the PROM burner LCD Actual screen information may differ from the illustrations Turn the PROM burner ON Lift the locking lever of the PROM socket and insert a blank chip into Socket B C Lock the chip into place by pushing the lever down Clear the PROM burner buffer by pressing JOB A and SET Figure 10 appears Invert the PROM burner by pressing JOB B and SET Figure 11 appears 9 F 10 9 F 11 Select the All option by pressing JOB SET and 2 This selection is used to the CFIG Software Figure 12 appears with All blinking To change the option press the SET button until desired option is blinking Select the blinking option by JOB Set the PROM burner for serial download by pressing JOB D 0 and SET Figure 13 appears prog Odd All or 12 recv Receiving S1 No 13 Exit the 4100 programmer At the DOS prompt change to the directory where job name is located and type the following XXXXXXXX mot com1 where XXXXXXXX represents the job and then press Enter to download the CFIG software to the PROM asterisk in Figure 13 will blink until the software is successfully To burn a CFIG chip ensure that the chip is locked into the appropriate socket or C then press PROG and SET Figure 14 appears with the asterisk to the left of Prog blinking Figure 15 after a successful burn prog All Prog prog 9 F 14 15 Steps 18 through 29 to manually download 4020 or 4100 Executive software 16 through 21 represent screens displayed on the PROM burner LCD Actual screen information may differ from the illustrations Turn the PROM burner ON Lift the locking lever of the PROM socket and insert a blank chip into Socket B C Lock the chip into place by pushing the lever down Clear the PROM burner buffer by pressing JOB A and SET Figure 16 appears or 4100 Software Invert the PROM burner by pressing JOB B and SET Figure 17 appears 9 F 16 9 F 17 Select the All option by pressing JOB SET and 2 This selection is used to the 4020 and 4100 Executive software Figure 18 appears with All blinking To change the option press the SET button until desired option is blinking Select the blinking option by JOB Set the PROM burner for serial download by pressing JOB D 0 and SET Figure 19 appears prog Odd All or 18 recv Receiving S1 No 19 Exit the 4100 programmer At the DOS prompt C where x the software version type one of the following 4020 mot com1 and then press Enter to download the 4020 softwa