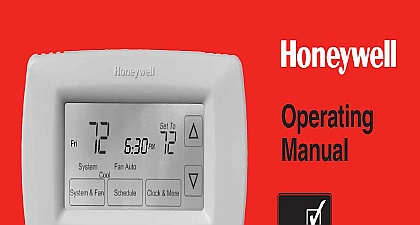
honeywell 7 day programmable thermostat RTH2510B Manual

File Preview
Click below to download for free
Click below to download for free
File Data
| Name | honeywell-7-day-programmable-thermostat-rth2510b-manual-9764012835.pdf |
|---|---|
| Type | |
| Size | 2.17 MB |
| Downloads |
Text Preview
Quick Installation Guide Thermostat Installation Guide System Type thermostat is compatible with the following systems oil or electric furnace air conditioner water system with or without pump system heating and cooling system pump without auxiliary backup heat you need assistance are here to help 1 800 468 1502 thermostat cannot be used on heat pumps with heat or on multistage systems Turn Off Power to Heating System Installation Guide Old Thermostat old thermostat but leave wallplate with attached not remove yet NOTICE not put your old thermostat the trash if it contains in a sealed tube your local waste authority for regarding recycling proper disposal thermostat Wires any wires are not attached to your old thermostat or are to a terminal marked C or C1 they will not be to your new thermostat Wrap the bare metal of each of these wires with electrical tape so it can touch and short other wires not use non connected not use C or C1 wires and label each wire WIRE COLORS terminal screw to identify wires and remove the old wallplate only after wires are labeled Wrap the wires around a pencil to them from falling though the wall opening Installation Guide New Wallplate the locking screw at the bottom of the Note that the screw is captive and cannot removed from the wallplate the thermostat from the wallplate as per 1 the wallplate against the wall and mark hole with a pencil Levelling is for esthetics only and will not affect performance of the thermostat holes at the marked positions and insert supplied anchors the wires through the large opening located at bottom center of the wallplate as per Figure 2 the wallplate to the wall with supplied mounting as per Figure 3 the wires to the terminals 1 2 3 Wires typical wiring each labeled wire with the terminal having the letter JUMPER YOU HAVE BOTH AND RC WIRES Y RC R G W the terminal screws using a screwdriver insert wires then tighten the screws any excess wire back into the wall opening don match a wire does not match any terminal designation see next page Installation Guide Wires alternate wiring labeled wire does not match any terminal designation see below Y RC R G W JUMPER BETWEEN R AND RC IF YOU HAVE ON BOTH R AND RC NOT USE C C1 OR X WIRE DO NOT USE B WIRE YOU ALREADY HAVE 0 WIRE WRAP BARE END OF WITH ELECTRICAL TAPE A JUMPER PIECE OF WIRE BETWEEN Y AND IF YOU ARE USING A HEAT PUMP WITHOUT HEAT Heating Fan Control jumper JP1 on the back of the thermostat if you connected a wire to the G terminal the jumper in this factory set position if have a gas or oil furnace the jumper to this position if you have electric furnace jumper setting An incorrect setting is notice in a gas or oil heating system When heating starts will initially feel cold air coming out of the vents as fan is running before the furnace has enough time to up the air Installation Guide Heat Pump Reversing Valve jumper JP2 on the back of the thermostat if you a heat pump the jumper in this factory set position if have connected O wire to the O B terminal the jumper to this position if you have B wire to the O B terminal jumper setting The heat pump operation will reversed i e it will cool in Heat mode and will heat in mode Batteries and 2 AAA batteries the back of the the two brackets the top of the with the slots the top of the the thermostat the wallplate the screw the bottom of the power back on the heating cooling Installation setup 11 display 12 display format 13 cycles per hour 14 protection 15 assistance 16 warranty 17 your new thermostat setup the procedure below to personalize and con the thermostat according to the heating cooling and hold the three seconds until the display appears as below and t buttons simultaneously number number the or t button to change the option the to advance to the next function and t buttons simultaneously for one the last function is displayed press the buttons to save any changes and exit the menu and If you do not press any button for 60 seconds you are in the setup menu the thermostat auto saves any changes made and exits the menu any time you can save the changes and exit by the Run button Installation Guide your new thermostat display the s or t button to select Fahrenheit or temperature display Fahrenheit temperature display Celsius temperature display correct setting is selected press both s and t display next function your new thermostat display format the s or t button to select 12 hour display or display 0 12 hour display 24 hour display correct setting is selected press both s and t display next function Installation Guide cycles per hour Make sure system switch is in the heat position the s or t button to select your heating and optimize its operation to 6 cycles per hour 5 12 min Gas or oil furnace Use this setting if you a standard gas or oil furnace that is less than efficient 30 min Steam or gravity system Use this setting if have a steam or gravity heat system 20 min Hot water or high efficiency furnace Use setting if you have a hot water system or a gas fur of greater than 90 efficiency 15 min Gas or oil furnace Use this setting if you a standard gas or oil furnace that is less than efficient 10 min Electric furnace Use this setting if you have type of electric heating system correct setting is selected press both s and t display next function Protection the s or t button to select compressor protec 1 On Off can occur if the compressor is too soon after shutdown This fea forces the compressor to wait 5 minute