Siemens FHB2005-U1 FHB2005-R1 3 HU Black Red Backbox, Installation Instructions

File Preview
Click below to download for free
Click below to download for free
File Data
| Name | siemens-fhb2005-u1-fhb2005-r1-3-hu-black-red-backbox-installation-instructions-9857413026.pdf |
|---|---|
| Type | |
| Size | 812.69 KB |
| Downloads |
Text Preview
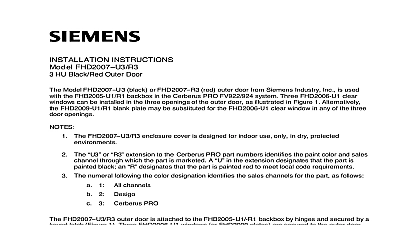
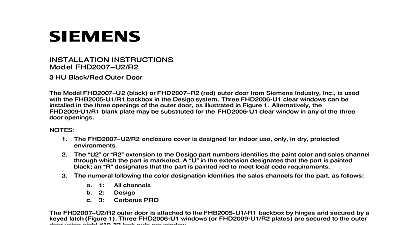
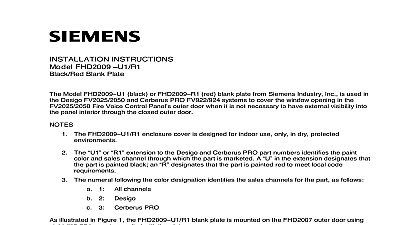
INSTALLATION INSTRUCTIONS FHB2005 HU Black Red Backbox Model FHB2005 and FHB2005 backboxes from Industry Inc are used in used in Desigo FV2025 2050 Cerberus PRO FV922 924 systems to house the Fire and Voice including the Fire and Voice system modules and assemblies one or two 300 Watt power supplies the backup batteries FHB2005 U1 R1 backbox illustrated in Figure 1 is shipped without the inner or outer doors The backbox contains space to mount one set of BTX 1 33 AH or f BTX 2 55 AH FHB2005 backbox can be surface mounted on a wall or within the wall The FHB2005 backbox is designed exclusively indoor use in dry environments The or extension to FS20 part numbers the paint color and sales channel through the part is marketed A in the extension that the part is painted black an that the part is painted red to meet local requirements The numeral following the color designation identifies sales channels for the part as follows 1 All channels 2 Desigo 3 Cerberus PRO Backbox 1 Backbox the location for a surface mounted backbox mounting surface for the backbox must be clean dry and free of shock and vibration Consider the factors when selecting the backbox mounting location Industry Inc Technologies Division Park NJ The mounting height should be compatible with convenient visual and manual access to the Module PMI Person Machine Interface through an opening in the outer door The mounting surface must be able to support the weight and size of the enclosure The installation must conform to applicable local codes All enclosure doors are hinged left the backbox Select a backbox mounting location clear of obstructions so that the front door opens freely the controls and indicators are easily accessible Level the backbox against the wall in the selected location Referring to Figure 2 select and remove the knockouts that will be needed to pull power and wiring into the Panel Mark the wall through the two top mounting bolt holes designated in Figure 2 3 8 1 2 5 8 1 2 1 2 1.0 NPT SIZE PLACES STRAP LOOSE END TO MOUNTED ON OUTER DOOR TYP MOUNTING HOLES PLS MARKED TYP 8 TYP NPT SIZE PLS 2 PLS MARKED 3 PLS MARKED USED FOR SEISMIC APPLICATIONS ONLY 2 Holes and Knockouts in the the FHB2005 Backbox Drill the top two backbox mounting holes at the marks made in Step 4 using a drill bit equal in to the inner thread diameter of the customer furnished mounting bolts 3 8 inch the customer furnished bolts into the holes drilled in Step 5 leaving a small gap between bolt head and the wall surface Place the backbox over the two top bolts and allow it to slide down behind the bolt heads Mark drill and install the two bottom bolts in the backbox at locations in Figure 2 seismic application sites three additional mounting bolts boles marked are required mounting the backbox in seismic application sites mark and drill the holes and three additional mounting bolts to fasten the backbox to the mounting surface Tighten all bolts securely Backbox the location for a semi flush mounted Panel Panel mounting location must be free of shock and vibration and should provide convenient to power and signal wiring run in the wall Consider the following factors when selecting a for a semi flush mounted Panel The mounting height should be compatible with convenient visual and manual access to the Voice PMI Person Machine Interface through an opening in the outer door If the backbox installation requires a wooden frame to be built into the wall to support the backbox 4 below select the frame location so that the Panel is accessible to required power and lines The installation must conform to applicable local codes All enclosure doors are hinged left the backbox recess mount the backbox electronics is installed after the backbox is mounted on the wall Position the backbox against the wall at the selected mounting location Level the backbox and mark its outline on the wall the backbox is to be Secured to a flat surface behind the wall perform steps 3 through 9 below Mounted inside a Panel mounting frame constructed on site for this purpose skip to 10 Cut a leveled opening in the wall surface no more than larger than the 421 16 X 21 outside of the backbox Referring to Figure 2 select and remove the knockouts that will be needed for power and wiring access to the Panel interior the FHA2043 U1 R1 trim kit on the backbox as directed in Siemens Industry Inc Technology Division document number A6V10370379 titled Instructions the Model FHA2043 U1 R1 Trim Kit for Model FHB2005 U1 R1 Black Red Backboxes Place the backbox with trim in the wall opening that was cut in step 4 and secure it in place Select a drill bit with diameter equal to the inner thread diameter approximately 3 8 inch of the furnished tapered mounting bolts to be used to fasten the backbox to the mounting Drill four bolt holes through the backbox and into the mounting surface at the positions marked and in Figure 2 For the bolt holes drill through the narrow upper portion of the bolt hole seismic applications drill three additional mounting bolt holes at the positions customer furnished mounting bolts into each of the holes drilled in step 8 Tighten bolts to complete the backbox installation If a mounting frame will be constructed to house the Panel cut a rectangular opening in the large enough to enable the frame to be built and or installed and secured in place within opening The wall opening should be slightly smaller than the overall dimensions of the plus trim Referring to Figure 2 select and remove the knockouts that will be needed for power and wiring access to the Panel interior Install the FHA2043 U1 R1 trim kit on the backbox as directed in Siemens Industry Inc Technology Division document number A6V10370379 titled Instructions the Model FHA2043 U1 R1 Trim Kit for Model FHB2005 U1 R1 Black Red Backboxes Construct the frame that will be used to house the Panel backbox Install the backbox into the frame and secure it in place through the sides top and bottom as needed compliance with NEC Article 760 all power limited fire protective signaling conductors must be by at least inch from the following control panel wiring electric light power Class 1 or non power limited fire protective signaling conductors installing power limited field wiring the installer must comply with NEC Article 760 which states fire alarm power limited circuits are installed using Types FPL FPLR FPLP or substitute cable provided these power limited cable conductors extending the jacket are separated by a minimum of 0.25 in 6.35 mm or by a sleeve or non conductive barrier from all other conductors If power limited cable or equivalent is not used within the FHB2005 enclosure the guidelines do not apply In such cases follow standard wiring practices the Panel to FC2050 Fire Control and Voice System installation instructions document ID A6V10315015 Wiring that enters the Panel from the right hand side is considered non power limited wiring Such must run the shortest route and must not overlap any power limited wiring Wiring that enters the Panel from the left hand side is considered power limited Such wiring must run shortest route and must not overlap any non power limited wiring the existing lances in th